

Changing the cutting bits on a CNC wood router is a crucial skill for anyone involved in woodworking. As a supplier of CNC wood routers, I understand the importance of this process and its impact on the quality of your woodworking projects. In this blog post, I'll guide you through the steps of changing the cutting bits on a CNC wood router, ensuring a smooth and efficient operation.
Why Changing Cutting Bits is Necessary
Before we delve into the process, let's understand why changing cutting bits is necessary. Over time, cutting bits wear out due to continuous use. A worn - out bit can lead to poor cutting quality, such as rough edges, inaccurate cuts, and increased tear - out on the wood surface. Additionally, different woodworking projects may require different types of cutting bits. For example, a straight bit is suitable for making grooves and dadoes, while a spiral bit is excellent for plunge cuts and 3D carving. By changing the cutting bits appropriately, you can achieve the best results for each project.
Tools Required
To change the cutting bits on your CNC wood router, you'll need the following tools:
- Allen wrenches: These are used to loosen and tighten the collet nut that holds the cutting bit in place. The size of the Allen wrench depends on the router's collet size.
- Cleaning brush: A small brush can be used to clean the collet and the cutting bit before installation. This helps to remove any debris or dust that could affect the performance of the bit.
- Safety glasses and gloves: Safety should always be a priority. Safety glasses protect your eyes from flying debris, and gloves prevent your hands from getting cut or injured during the process.
Step - by - Step Guide to Changing Cutting Bits
Step 1: Power Off the Router
Before you start changing the cutting bit, make sure the CNC wood router is powered off and unplugged from the electrical source. This is a fundamental safety measure to prevent accidental start - up, which could cause serious injury.
Step 2: Access the Collet
The collet is the part of the router that holds the cutting bit. On most CNC wood routers, the collet is located at the end of the spindle. You may need to remove a dust cover or a small access panel to reach the collet. Refer to your router's user manual for specific instructions on accessing the collet.
Step 3: Loosen the Collet Nut
Using the appropriate Allen wrench, insert it into the hole on the collet nut and turn it counter - clockwise to loosen it. As you turn the nut, you'll feel the collet start to open up. Be careful not to over - loosen the nut, as this could cause it to fall off.
Step 4: Remove the Old Cutting Bit
Once the collet nut is loose enough, gently pull the old cutting bit out of the collet. If the bit is stuck, you can try tapping the end of the spindle lightly with a rubber mallet to loosen it. However, be very cautious when doing this to avoid damaging the spindle or the router.
Step 5: Clean the Collet and the New Bit
Use the cleaning brush to clean the inside of the collet. Remove any sawdust, chips, or debris that may have accumulated. Also, clean the shank of the new cutting bit to ensure a proper fit. A clean collet and bit will help to maintain the accuracy and performance of the router.

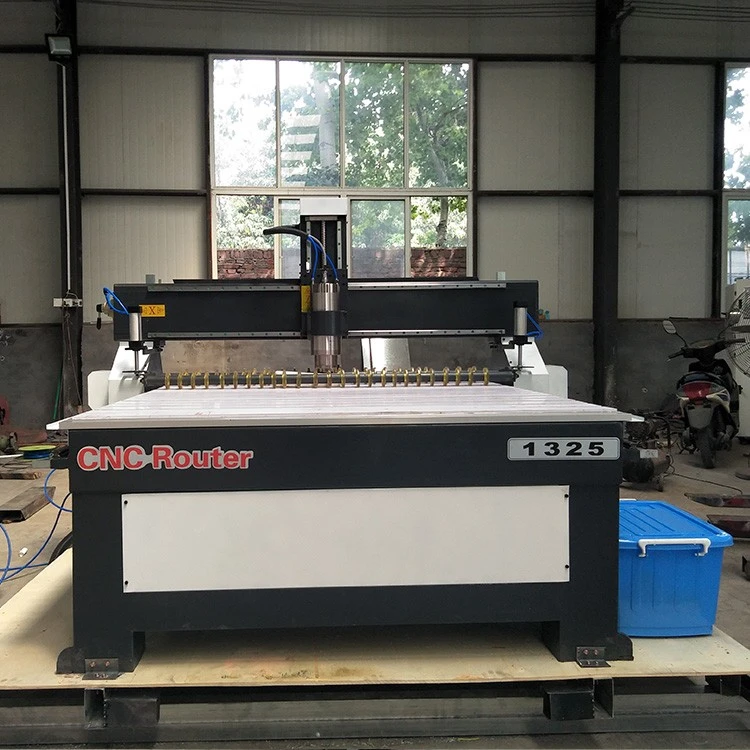
Step 6: Insert the New Cutting Bit
Carefully insert the shank of the new cutting bit into the collet. Make sure the bit is inserted straight and fully seated in the collet. The shank should be inserted at least as deep as the recommended depth specified by the router manufacturer.
Step 7: Tighten the Collet Nut
Using the Allen wrench, turn the collet nut clockwise to tighten it. Tighten the nut firmly, but do not over - tighten it. Over - tightening can damage the collet or the bit and may also affect the performance of the router.
Step 8: Check the Bit Alignment
After tightening the collet nut, visually inspect the cutting bit to ensure it is properly aligned. The bit should be straight and centered in the collet. You can also use a dial indicator to check the runout of the bit. Excessive runout can cause uneven cuts and premature wear of the bit.
Step 9: Replace the Access Panel (if applicable)
If you removed an access panel to reach the collet, put it back in place. Make sure it is securely fastened to prevent dust and debris from entering the router.
Step 10: Power On the Router and Test
Once you've completed all the above steps, plug in the router and power it on. Run a test cut on a scrap piece of wood to check the performance of the new cutting bit. Look for smooth cuts, accurate dimensions, and minimal tear - out. If you notice any issues, such as vibration or poor cutting quality, double - check the bit installation and alignment.
Different Types of Cutting Bits and Their Applications
As a CNC wood router supplier, I know that choosing the right cutting bit for your project is as important as changing it correctly. Here are some common types of cutting bits and their applications:
- Straight bits: These are the most basic type of cutting bits. They are used for making straight cuts, grooves, and dadoes. Straight bits come in various diameters, allowing you to create different - sized cuts. You can find more information about the routers suitable for using straight bits on our Cnc For Wood Working page.
- Spiral bits: Spiral bits are designed for plunge cuts and 3D carving. They have a spiral flute design that helps to evacuate chips more efficiently, resulting in cleaner cuts and less heat build - up. Our Wood 3d Carving Machine is well - suited for using spiral bits in complex carving projects.
- V - bits: V - bits are used for engraving and creating decorative edges. They have a V - shaped cutting edge that can create sharp, detailed cuts. If you're interested in engraving projects, our CNC Computer Engraving Machine paired with V - bits can achieve excellent results.
Troubleshooting Common Issues
Even if you follow all the steps correctly, you may encounter some issues when changing cutting bits. Here are some common problems and their solutions:
- Bit not holding securely: If the cutting bit is not held tightly in the collet, it may be due to a dirty collet or an improper tightening of the collet nut. Clean the collet and re - tighten the nut to ensure a secure fit.
- Excessive vibration: Vibration can be caused by a misaligned bit or a worn - out collet. Check the bit alignment and replace the collet if necessary.
- Poor cutting quality: This could be due to a dull bit, incorrect feed rate, or improper spindle speed. Replace the bit if it is dull, and adjust the feed rate and spindle speed according to the wood type and the bit being used.
Conclusion
Changing the cutting bits on a CNC wood router is a relatively simple process if you follow the right steps and take the necessary safety precautions. As a CNC wood router supplier, we are committed to providing you with high - quality routers and the knowledge to use them effectively. Whether you're a professional woodworker or a hobbyist, mastering the art of changing cutting bits will enhance your woodworking experience and help you achieve better results in your projects.
If you're interested in purchasing a CNC wood router or need more information about our products, please feel free to contact us. We're here to assist you with all your woodworking needs and ensure that you get the most out of your CNC wood router.
References
- Manufacturer's user manuals for CNC wood routers
- Woodworking industry best practices and standards


